Unlocking the Software Testing Life Cycle Phases
Discover the essential software testing life cycle phases. This guide breaks down each stage with clear examples to help you deliver quality software.
Automate and scale manual testing with AI ->
The Software Testing Life Cycle (STLC) is a roadmap that quality assurance teams follow, guiding them through six distinct phases from initial planning all the way to project wrap-up. Think of it as a systematic checklist that makes sure testing is thorough, efficient, and perfectly in sync with the development process. The goal? To catch bugs early and often.
What Is the Software Testing Life Cycle?
Imagine you’re building a house. You wouldn’t just start throwing up walls and hope for the best. You’d have blueprints, inspect the foundation, check the framing, and test the plumbing. The STLC is that same meticulous, step-by-step inspection process, but for software.
It’s not just a random series of tests. It’s a structured sequence where each phase builds on the last, ensuring that nothing falls through the cracks. By following this cycle, QA teams can systematically validate every part of an application, align their work with development milestones, and ultimately ship a product that is reliable, secure, and ready for users.
If you’re looking for a wider lens on QA principles, our comprehensive overview of software testing is a great place to start.
Why You Need a Formal STLC
Without a defined process, software testing can quickly descend into chaos. It becomes a reactive scramble to find bugs right before a deadline, which almost always means critical issues are missed and release dates get pushed. A formal STLC brings much-needed order, clarity, and predictability to the entire quality assurance effort.
The practical benefits are immediate and significant:
- Catch Bugs Early (and Save Money): Finding a defect in the early design phase is exponentially cheaper to fix than one discovered by users in a live product.
- Boost Product Quality: A methodical process ensures every feature and requirement is properly tested, resulting in a more stable and trustworthy application.
- Get Everyone on the Same Page: With clear goals and deliverables at each stage, communication between testers, developers, and project managers becomes much smoother.
- Work Smarter, Not Harder: A clear plan helps teams use their time and resources wisely, cutting out redundant work and focusing on what matters most.
This flowchart maps out the six core phases of the STLC, showing how the process moves from understanding the requirements to formally closing the testing cycle.
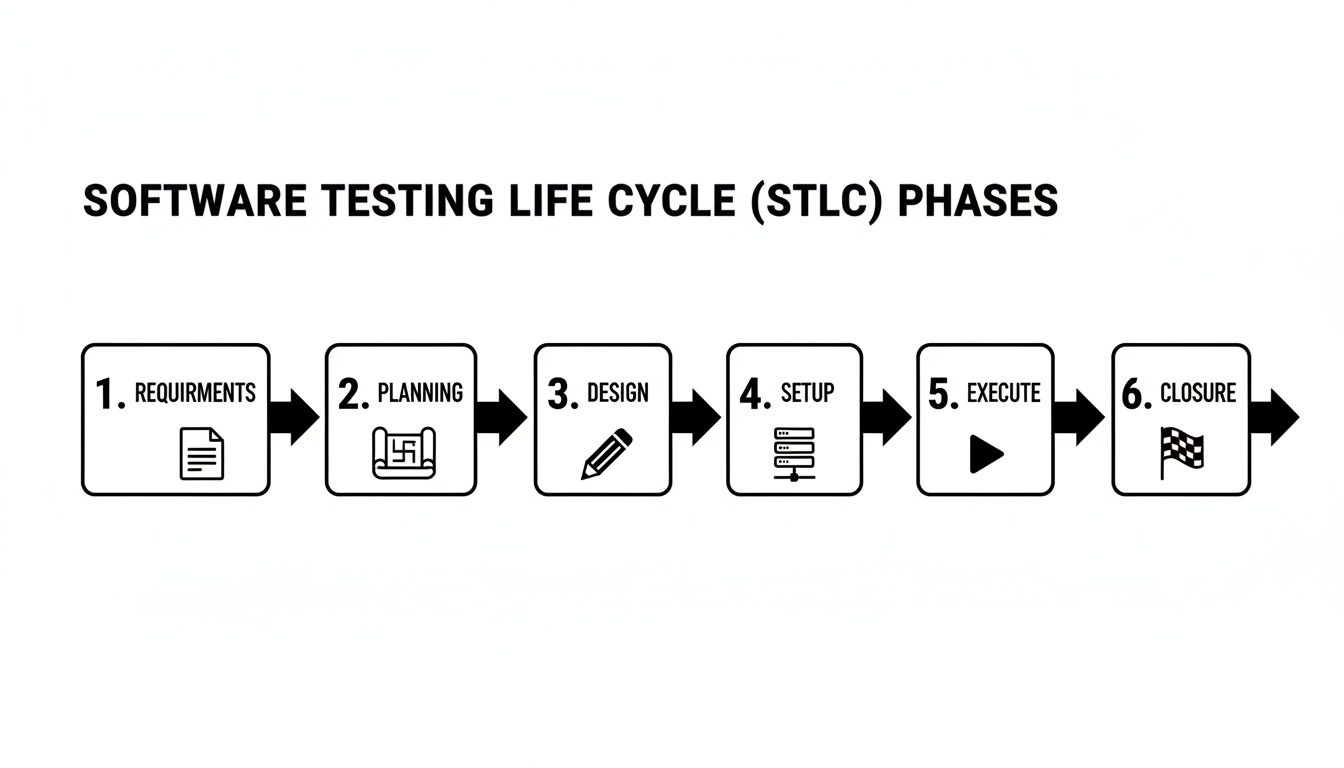
As you can see, it’s a logical progression. The output of one phase becomes the critical input for the next, creating a chain of activities that ensures comprehensive quality control.
The Software Testing Life Cycle (STLC) isn’t separate from the Software Development Life Cycle (SDLC)—it runs right alongside it. While the SDLC is all about building the software, the STLC is laser-focused on validating it every step of the way.
To get a better sense of how QA fits into the bigger business picture, this strategic guide to QA and testing offers some great high-level insights. Now, let’s break down each of these six phases to see how they work in practice.
The Six Core Phases of the STLC at a Glance
Before we dive deep into each phase, this table provides a quick summary of what happens at each stage of the Software Testing Life Cycle. It highlights the main goal of each phase and what tangible outcome you can expect from it.
| Phase | Core Objective | Primary Outcome |
|---|---|---|
| 1. Requirement Analysis | Understand and clarify what needs to be tested. | Testability report and Requirement Traceability Matrix (RTM). |
| 2. Test Planning | Define the testing strategy, scope, and resources. | A comprehensive Test Plan document and effort estimation. |
| 3. Test Case Design | Create the detailed, step-by-step test cases. | Approved test cases, test scripts, and test data. |
| 4. Test Environment Setup | Prepare the hardware, software, and data for testing. | A fully configured and stable test environment. |
| 5. Test Execution | Run the prepared test cases and log the results. | Detailed test execution reports and defect logs. |
| 6. Test Cycle Closure | Finalize and document the entire testing process. | A final Test Closure Report and archived test artifacts. |
This bird’s-eye view shows how the STLC moves from high-level strategy to hands-on execution and, finally, to formal sign-off. Each step is essential for building a robust and reliable product.
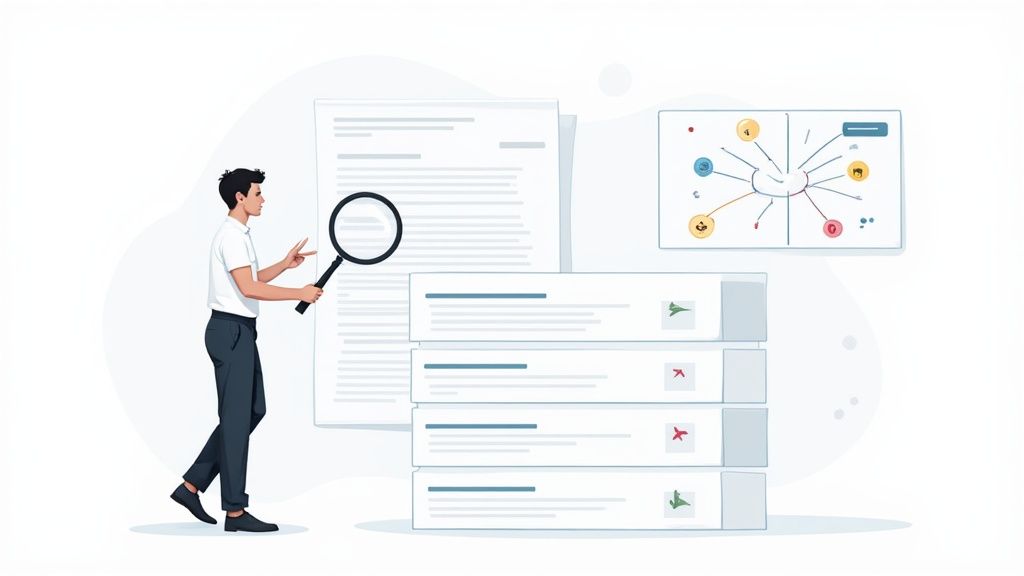
Phase 1: Analyzing Requirements for Testability
Think of any great building project. It doesn’t start with laying bricks; it starts with a solid blueprint. In the world of software, project requirements are that blueprint, and this first phase of the STLC is all about poring over them with a fine-tooth comb. This is where testing truly begins, moving beyond a simple project idea to a detailed breakdown of what the software needs to do.
This isn’t just about reading a document. It’s an active, collaborative process. The Quality Assurance (QA) team gets in a room—virtual or otherwise—with business analysts, product owners, and developers. Together, they dissect every functional requirement (what the system does) and non-functional requirement (how well it does it). The big question isn’t just “What are we building?” but rather, “Is this requirement clear, complete, and—most importantly—is it actually testable?”
Spotting Vague and Untestable Requirements
You’ve probably seen a requirement like, “The user interface should be user-friendly.” How do you test that? You can’t, not objectively. It’s a classic example of a vague, subjective statement that testers can’t work with. The whole point of this phase is to turn those fuzzy statements into concrete, verifiable criteria.
Good requirement analysis is all about sniffing out problems before they become defects. You learn to look for common red flags:
- Ambiguity: Requirements that could mean two different things to two different people.
- Contradictions: When one requirement directly clashes with another.
- Incompleteness: Missing details that leave developers and testers guessing about how a feature should really work.
Catching these issues early on prevents the classic “garbage in, garbage out” scenario, where poorly defined requirements inevitably lead to a buggy product.
This foundational step is where you start baking quality into the product, long before a single line of code is written. It’s about preventing defects, not just finding them later.
The main artifact to come out of this phase is the Requirement Traceability Matrix (RTM). This is essentially a master spreadsheet that maps every single requirement to the specific test cases designed to check it. It’s your guarantee that nothing gets missed and every feature has a test plan.
The Ripple Effect of Getting It Right Early
Getting this phase right has a massive ripple effect down the line. It’s not just a nice-to-have. Organizations that integrate testing from the get-go see 84% first-run success rates in User Acceptance Testing (UAT) and can ship products weeks faster. This is a world away from the old-school approach, where finding issues after development easily adds two to four weeks of delays.
This collaborative approach is quickly becoming the norm. A 2023 World Quality Report revealed that 68% of agile teams now analyze requirements alongside developers and product owners. The result? They slash early-stage defects by a whopping 35%. If you want to dig deeper into these numbers, this software testing life cycle guide has some great insights.
How AI Gives Requirement Analysis a Boost
Let’s be honest: manually combing through hundreds of pages of requirement documents is tedious and it’s easy to miss things. This is where an AI agent like TestDriver can make a huge difference. Instead of relying solely on human review, teams feed their requirement documents, user stories, or even design mockups directly to the tool.
The AI agent gets to work immediately, and can:
- Flag Ambiguities: It’s trained to spot vague language or incomplete thoughts that need to be clarified by the team.
- Suggest Test Scenarios: It can generate a solid first draft of high-level test scenarios straight from the requirements, giving you a running start on test design.
- Identify Dependencies: It can see connections between different requirements that a human might easily overlook.
For example, give it a simple requirement like, “Users must be able to securely log in with a username and password.” TestDriver won’t just see a login form. It will instantly propose tests for valid credentials, wrong passwords, empty fields, and even security cases like account lockout policies after too many failed attempts. This builds a much stronger testing foundation from day one, making the entire cycle more thorough and efficient.
2. Crafting the Test Plan and Strategy
Alright, you’ve dissected the requirements and know what you need to test. Now comes the real generalship: figuring out how. This is the Test Planning phase, where we create the master blueprint for the entire testing operation.
Think of it as moving from a wish list to a battle plan. It’s where abstract goals get translated into a concrete strategy with timelines, resources, and clear objectives. The test lead or QA manager typically spearheads this, mapping out everything the team will need to do from start to finish.
This plan becomes the single source of truth for everyone involved. It’s also where the budget and schedule get real, as you start estimating effort, picking your tools, and defining the exact test environment you’ll need. Every choice here has a ripple effect on the rest of the project.
Test Plan vs. Test Strategy: What’s the Difference?
People often use “Test Plan” and “Test Strategy” interchangeably, but they’re not the same thing. Nailing down the distinction is crucial for keeping your quality efforts organized.
- A Test Strategy is the high-level, “big picture” document. It’s a bit like a company’s constitution for quality—it defines the overall testing approach and standards and rarely changes from project to project. It answers broad questions like, “What types of testing do we value?” or “What are our guiding principles for quality?”
- A Test Plan, on the other hand, is tactical and project-specific. It’s the detailed roadmap for a particular release or feature. It gets into the nitty-gritty: scope, schedules, resources, and specific features to be tested. It answers questions like, “What exactly are we testing in the Q3 release?” and “Who is running the performance tests on Tuesday?”
In short, the strategy is the long-term vision; the plan is the step-by-step guide for the journey ahead. We take a much deeper look at this in our guide on traditional vs. modern test plan formats.
Why Planning Is More Than Just Paperwork
A solid plan isn’t just bureaucratic box-ticking. It’s a strategic move that saves a ton of headaches later. Good planning can cut testing timelines by 25% and helps teams allocate 10-15% of their project budget more wisely. The result? As many as 50% fewer critical defects slipping into production.
The Test Plan is more than a schedule; it’s a risk management tool. By proactively identifying potential roadblocks—like an unavailable test environment or a complex third-party integration—teams can create mitigation plans before these issues derail the project.
The core activities in this phase really boil down to a few key things:
- Defining Scope: Drawing a clear line in the sand—what’s in, and what’s out.
- Planning Resources: Figuring out who does what and when.
- Selecting Tools: Choosing the right tech for both manual and automated testing.
- Analyzing Risk: What could go wrong? Let’s talk about it now, not when it’s on fire.
- Setting Entry & Exit Criteria: Defining what “ready to test” and “done” actually mean in concrete terms.
Using AI to Build Smarter Test Plans
One of the oldest challenges in test planning is accurately estimating time and resources. It often feels more like art than science. This is where an AI agent like TestDriver can make a huge difference.
Instead of relying on gut feelings or past projects that might not be a perfect match, TestDriver can analyze the Requirement Traceability Matrix (RTM) you built in the last phase to generate data-driven estimates.
It can look at the complexity of user stories—say, for a brand-new payment gateway—and give you a much more precise projection of the QA hours required for design and execution. This helps you build a project timeline that’s ambitious but, more importantly, actually achievable.
Designing and Developing Test Cases
With a solid plan in hand, it’s time to roll up our sleeves and move from high-level strategy to on-the-ground execution. This is where we get into Test Case Design—the critical phase where abstract requirements and user stories get translated into concrete, step-by-step instructions.
Think of it this way: the test plan is the architect’s blueprint for a new building. The test cases? Those are the specific, detailed instructions for the construction crew: “Lay this brick here,” or “Install this window at this exact height.” Each test case is a mini-script designed to verify a single piece of the application’s functionality.
The end goal here is to build a collection of tests that are crystal clear, concise, and repeatable. It doesn’t matter if a test is run by a person or an automation script—the steps and expected results have to be completely unambiguous to get consistent, reliable outcomes every time.
From Theory to Actionable Scripts
This is where the real craft of testing comes into play. You can’t possibly test every single input and combination—it’s just not feasible. Instead, we use smart test design techniques to get the maximum amount of coverage without writing thousands of redundant tests.
Two of the most powerful and time-tested techniques are:
- Equivalence Partitioning: This is a fancy way of saying we group similar inputs together. If a form field accepts numbers from 1 to 100, we don’t need to test every number. We can create three groups, or “partitions”: valid numbers (1-100), invalid numbers below the range (<1), and invalid numbers above the range (>100). We only need to test one value from each group to be confident.
- Boundary Value Analysis (BVA): This technique zeroes in on the “edges” of input ranges, because that’s where bugs love to hide. For that same 1-100 example, BVA tells us to test the values right around the boundaries: 0, 1, 2 and 99, 100, 101.
Using methods like these helps focus our effort where it counts most. Of course, keeping all these tests organized is another challenge. For a closer look at that, our guide on understanding test case management systems has some great insights.
The Rise of AI in Test Case Generation
Let’s be honest: manually writing hundreds of test cases is one of the biggest drains on time and energy in the entire software testing life cycle. It’s repetitive, it’s easy to make a small mistake, and it can burn out the creativity your team needs for more complex testing. This is exactly where AI agents like TestDriver completely change the game.
An engineer might spend hours scripting every positive, negative, and edge case for a single user story. AI can generate a more comprehensive suite of tests in just a few minutes. This isn’t a small improvement; it smashes one of the biggest bottlenecks in the whole process.
This shift lets QA engineers evolve from being scriptwriters into becoming true test strategists. They can hand off the tedious, mind-numbing work and apply their expertise to much higher-value activities.
How TestDriver Accelerates Test Design
With a tool like TestDriver, the process becomes incredibly fluid. An engineer simply provides a prompt based on a user story, like, “Generate end-to-end tests for the user registration flow, ensuring all validation rules are covered.”
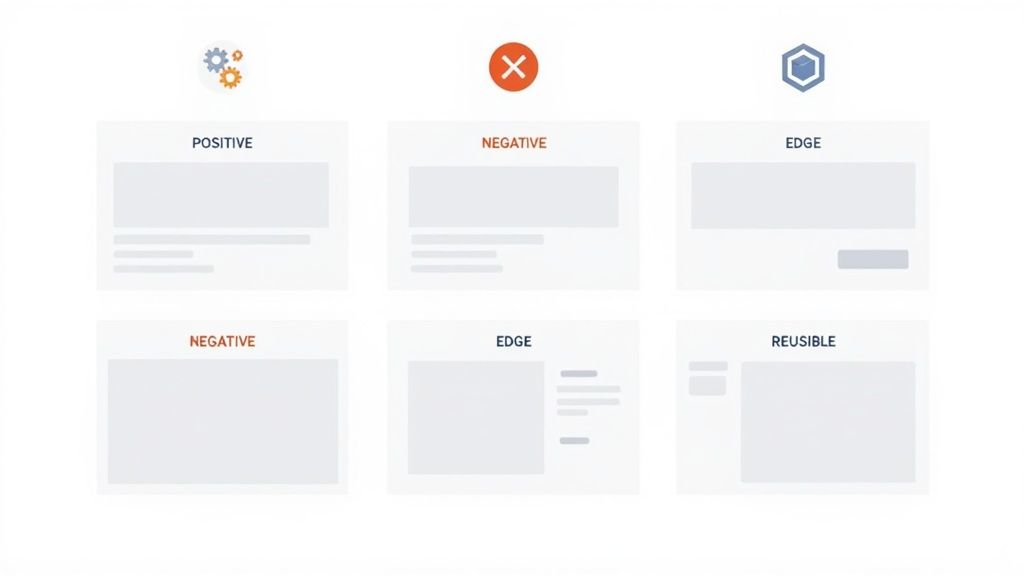
From that simple instruction, TestDriver gets to work and automatically generates a full set of tests:
- Positive Scenarios: It creates tests for the “happy path”—when a user fills everything out correctly and successfully registers.
- Negative Scenarios: It designs tests for all the things that could go wrong, like someone entering a bad email format, a weak password, or leaving a required field blank.
- Edge Cases: It thinks of the less obvious but critical situations, like trying to use special characters in a username or attempting to register with an email that’s already in the system.
This frees up your best people to focus on the things that still require a human touch: exploratory testing, performance analysis, and security validation. By automating the foundational test case creation, teams get better coverage faster, making the entire testing process more efficient and a whole lot more effective.
Setting Up the Test Environment
Now that we’ve meticulously designed our test cases, it’s time to build the stage where the action happens. Welcome to the Test Environment Setup phase. You can think of it like a dress rehearsal for a play—you wouldn’t start the show without the right stage, props, and lighting, would you?
This phase often runs side-by-side with test case design, mainly because getting a proper test environment up and running can take some time. At its core, a test environment is a dedicated server setup where we install and test the software. It’s a carefully constructed mix of hardware, software, and network settings that needs to mirror the live production environment as closely as possible.
The whole point is to finally put an end to the classic developer excuse: “but it works on my machine!” By testing in a consistent, production-like environment, we can be confident that the bugs we find are real issues with the application, not just weird glitches from a wonky local setup. This isn’t just a nice-to-have; it’s a critical step for trustworthy test results.
Core Components of a Test Environment
Building the right environment is far more than just installing the latest code. It’s a precise operation that demands close teamwork between developers, QA engineers, and system administrators.
Here’s what’s typically involved:
- Hardware and Software Configuration: This means making sure the servers, operating systems, and even browser versions all line up with the specs we laid out in the test plan.
- Test Data Preparation: You can’t run tests without data. This step involves loading databases with a rich variety of realistic information that our test cases will use.
- Network Setup: We need to simulate how real users will connect. That might involve configuring different bandwidth speeds or setting up firewalls to match the production network.
- Tool Installation: All the tools of the trade need to be installed and ready to go, from automation frameworks like Selenium to performance monitors and test management systems.
A poorly configured test environment is a leading cause of false negatives in testing. That’s when a test fails because of an issue with the environment itself, not a bug in the code. This wastes a ton of time and chips away at the team’s confidence in the QA process.
The All-Important Smoke Test
With the environment configured and the latest build deployed, what’s the very first thing we do? We run a smoke test.
This isn’t an exhaustive deep dive. Instead, a smoke test is a quick, high-level check to make sure the application’s most basic, critical functions are actually working. The name comes from hardware engineering—when you power on a new circuit board for the first time, you check to see if it starts smoking.
Our smoke test answers a simple, vital question: “Is this build even stable enough to start testing?” If users can’t log in or the main dashboard won’t load, there’s absolutely no point in diving into hours of detailed test cases.
A successful smoke test is the green light we’ve been waiting for. It confirms the environment is stable and ready for the main event: Test Execution. It’s the gatekeeper that stops the team from wasting energy on a broken build, ensuring our efforts are focused on finding meaningful bugs.
Executing Tests and Reporting Defects
This is where the rubber meets the road. All the meticulous planning and test case design comes down to this moment: running the tests against the actual software. The goal is simple but crucial: find out where the application’s behavior deviates from what everyone agreed it should do.
The QA team systematically works through the test suites, executing each case. This is a mix of art and science, combining hands-on manual testing where an engineer acts like a real user, and automated testing, where scripts rapidly check repetitive functions. Every test ends with a verdict: pass, fail, or blocked. This creates a living, breathing report card on the software’s stability.
When a test fails, a potential bug has been found. Now, the job shifts from running tests to meticulously documenting what went wrong, kicking off the defect lifecycle.
The Art of a Great Defect Report
A bug that can’t be reproduced is a bug that won’t get fixed. It’s that simple. This is why a high-quality defect report is arguably the most valuable thing a QA team produces. You’re not just pointing a finger and saying “it’s broken”; you’re giving developers a clear, actionable roadmap to find the root cause and fix it.
A well-written bug report can be the difference between a quick fix and weeks of frustrating back-and-forth. The best ones always include:
- A Clear and Concise Title: “User Unable to Checkout with Expired Credit Card” is far better than “Checkout Broken.”
- Detailed Steps to Reproduce: A numbered list of the exact actions that triggered the bug. No step is too small.
- Expected vs. Actual Results: A simple, direct comparison: “I expected X to happen, but Y happened instead.”
- Supporting Evidence: Screenshots, video recordings, or console logs are non-negotiable. They provide undeniable proof.
- Environment Details: Was this on Chrome for Mac? A specific mobile device? The build version? This context is critical.
Think of a defect report as a crime scene investigation for developers. The more clues you provide—fingerprints (screenshots), timelines (steps), and context (environment)—the faster they can solve the case and deliver a fix.
Once logged in a tool like Jira, the bug starts its own journey: it gets assigned to a developer, worked on, sent back to QA for re-testing, and eventually, closed. This structured process ensures no bug gets left behind.
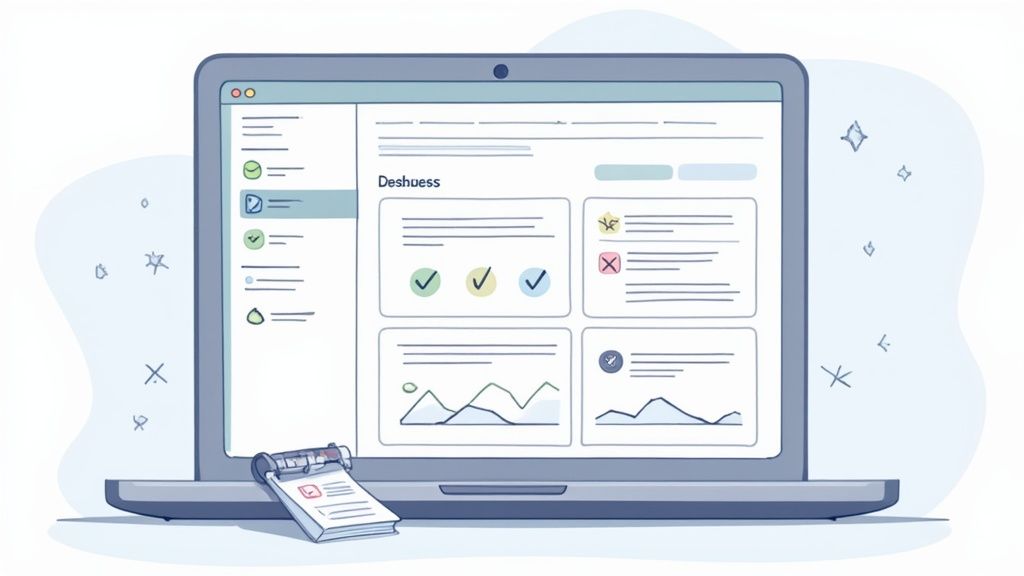
Tracking Progress and Making Data-Driven Decisions
This phase is a goldmine of data. Modern test execution platforms offer real-time dashboards that give everyone a clear view of the software’s quality. Stakeholders can see key metrics like pass/fail rates, which parts of the app have the most bugs (defect density), and how much of the test plan is complete.
These insights aren’t just for show; they drive critical decisions. A sudden spike in failed tests after a new piece of code is deployed probably means a major regression that needs all hands on deck. It’s also during this phase that you run specialized tests, and being clear on your strategy, like distinguishing between penetration testing and vulnerability scanning, helps you find and document defects more effectively.
How TestDriver Streamlines Execution and Reporting
Manually running through complex, end-to-end user flows is a massive time sink. TestDriver helps by automatically executing the AI-generated test suites, giving you incredibly fast feedback on your application’s core functionality across different browsers.
But here’s the best part. When a TestDriver test fails, it doesn’t just throw up a red flag. It captures the exact point of failure with screenshots and detailed logs, essentially creating most of the defect report for you. An engineer can go from seeing a failed test to logging a high-quality, evidence-backed bug in seconds. This makes the feedback loop to the development team as fast and efficient as possible—a cornerstone of modern software testing life cycle phases.
Closing the Cycle and Improving Processes
The final phase of the STLC isn’t about shutting down your laptop and calling it a day. Test Cycle Closure is where the real learning happens. It’s a formal wrap-up, sure, but more importantly, it’s a chance to step back and examine not just the software, but the entire testing process itself.
Think of it like a post-game analysis. You don’t just celebrate the win or mourn the loss; you review the tape. What plays worked? Where did communication break down? How can we be sharper next time? This phase is all about capturing those lessons so the entire QA process gets smarter and more efficient with every project.
A huge part of this is putting together the Test Summary Report. This document is the final verdict on the testing cycle, giving all stakeholders a clear and complete picture of what went down.
Analyzing the Results and Metrics
This summary report is much more than a simple pass/fail tally. It’s a story told with data, detailing the highs and lows of the testing effort. It’s where you turn all the raw numbers from the past few weeks or months into real insights that can guide future work.
Some of the key metrics you’ll want to dig into are:
- Test Coverage: What percentage of the requirements did we actually test? This is a reality check that quickly exposes any blind spots in our test plan.
- Defect Density: How many bugs popped up per feature or line of code? This helps us flag the most fragile parts of the application that might need more attention.
- Cost Per Bug: A rough calculation of the effort spent finding and fixing defects. It’s a powerful way to show the business value of catching bugs early.
- Defect Removal Efficiency (DRE): This is a big one. It measures how many bugs the QA team caught before release versus how many slipped through to customers. A high DRE is a great sign of a healthy process.
These metrics aren’t just for a spreadsheet; they’re for having better conversations. They ground discussions in reality, shifting the focus from “I feel like…” to “The data shows that…” This allows everyone to make smarter decisions for the next development cycle.
The goal of Test Cycle Closure isn’t to point fingers for bugs. It’s to build a data-driven feedback loop that systematically raises the bar for quality, project after project.
The Team Retrospective and Continuous Improvement
Numbers only tell part of the story. The other critical piece is the human element, and that’s where the team retrospective comes in. This is a meeting—a real, honest conversation—where testers, developers, and product owners get together to talk about the process. It’s meant to be a safe space to discuss what went smoothly, what was a total headache, and what everyone can do to make the next cycle better.
These discussions are the fuel for continuous improvement. Maybe the test environment was constantly crashing, or bug reports were too vague to be useful. By calling out these pain points, the team can create an action plan to fix them, ensuring the next project doesn’t get bogged down by the same old problems.
This is another area where automation provides a huge lift. For example, TestDriver can automatically generate detailed reports on test execution times and failure rates, giving you concrete data to bring to the retrospective. When you can pinpoint which test suites are slowest or fail most often, you can have a much more focused conversation about where the real bottlenecks are. This is how modern teams complete the software testing life cycle phases and set themselves up for success again and again.
Ready to accelerate your testing process and get better feedback, faster? See how TestDriver can automatically generate comprehensive test cases for your application in minutes. Start building better tests today at https://testdriver.ai.
Automate and scale manual testing with AI
TestDriver uses computer-use AI to test any app - write tests in plain English and run them anywhere.