Automated Testing Using Jenkins From Setup to Scale
Master automated testing using Jenkins with our practical guide. Learn to build CI/CD pipelines, integrate testing tools, and scale your QA efforts effectively.
Automate and scale manual testing with AI ->
Automated testing in Jenkins is all about using the open-source automation server to orchestrate your build, test, and deployment pipeline. It becomes the central command center that automatically kicks off your test suites every time new code is checked in. This tight feedback loop is exactly what development teams need to catch bugs early, speed up releases, and build quality right into the development process from day one.
Why Jenkins Is a Go-To for Test Automation
Before we start building our pipeline, let’s talk about why Jenkins is still the engine behind so many top-tier QA teams. It’s been around for a while, and its staying power isn’t just because it’s open-source. It’s really about the raw, unfiltered control it gives you. While shiny new tools pop up all the time, Jenkins offers a level of flexibility that’s tough to beat, making it a strategic choice for any serious automation initiative.
The real magic of Jenkins is its massive plugin ecosystem. Think of it as a universal adapter for your entire tech stack. This lets you plug in pretty much any testing tool you can think of:
- UI Testing: You can seamlessly run frameworks like Selenium, Cypress, or Playwright to make sure the user interface looks and works as expected.
- API Testing: Trigger your Postman collections or execute REST Assured tests to validate all your backend services.
- Performance Testing: Kick off JMeter or Gatling scripts to see how your application holds up under heavy traffic.
- Security Scanning: Fold in tools like SonarQube or OWASP ZAP to catch vulnerabilities before they make it to production.
To give you a clearer picture, here’s a quick breakdown of why these features are so valuable.
Key Jenkins Features for Automated Testing
| Feature | Benefit for QA and Developers |
|---|---|
| Extensive Plugin Ecosystem | Allows integration with virtually any tool (Selenium, Cypress, etc.), creating a unified testing workflow without vendor lock-in. |
| Declarative & Scripted Pipelines | Offers both a simple, structured syntax and a powerful, flexible scripting environment to define complex CI/CD logic as code. |
| Distributed Builds | Enables running tests in parallel across multiple machines (agents), drastically reducing execution time for large test suites. |
| Rich Community Support | Provides access to a massive community for troubleshooting, best practices, and a steady stream of new plugins and integrations. |
This core functionality is what allows Jenkins to adapt to just about any technical challenge you can throw at it.
Unmatched Flexibility in the Real World
This adaptability is a huge deal in complex corporate environments. Picture this: you need to integrate a custom-built internal testing tool or a legacy system that doesn’t play nice with modern APIs. With Jenkins, you can usually write a simple shell script or a small custom plugin to make it work. That’s a level of problem-solving you just don’t get with more rigid, closed-off platforms.
Jenkins isn’t just a CI/CD tool—it’s a strategic orchestrator for quality. It empowers you to embed any type of automated check directly into your development workflow, making quality assurance a continuous, automated process rather than a final, manual gate.
This power to connect all the dots is why Jenkins scales so well. It can grow from a single team running a few unit tests to a massive enterprise orchestrating thousands of parallel tests across different agents and operating systems. Its dominance in the CI/CD world is no fluke; Jenkins holds around 47.13% market share among automation servers. For more on this, you can find some great insights about CI/CD pipeline trends on Nucamp.co.
When you stop seeing Jenkins as just a build server, you realize its true potential as the core engine for shipping higher-quality code, faster.
Building Your First Automated Testing Pipeline
Alright, enough with the theory. Let’s get our hands dirty and build a real, working pipeline for automated testing in Jenkins. This is where the magic happens—we’ll set up a Pipeline job that pulls your code from its repository and runs through a series of steps you define.
First things first, you need to create a new “Pipeline” job from your Jenkins dashboard. The reason we use this job type is for its “pipeline-as-code” approach. Instead of clicking through a bunch of UI options, you define your entire process in a text file called a Jenkinsfile that lives right alongside your application code. This is huge because it means your CI/CD process is now version-controlled.
Configuring the Jenkins Job
Once you’ve created the Pipeline job, you just need to do a tiny bit of configuration in the Jenkins UI. The main thing is to point Jenkins to your Git repository. You’ll plug in the repository URL and add any credentials it needs to pull the code.
Then, you simply tell Jenkins to look for a Jenkinsfile in the root of that repository. That’s it. All the heavy lifting and logic will now happen inside that Jenkinsfile.
Think of the Jenkinsfile as your recipe. It uses a straightforward, Groovy-based syntax to define stages, which are just logical steps in your workflow. Common stages include checking out code, building the application, and, of course, running your tests. This structure keeps everything clean, organized, and easy to understand at a glance.
This process is really about connecting your tools, scaling your tests, and controlling the entire flow from one central place.
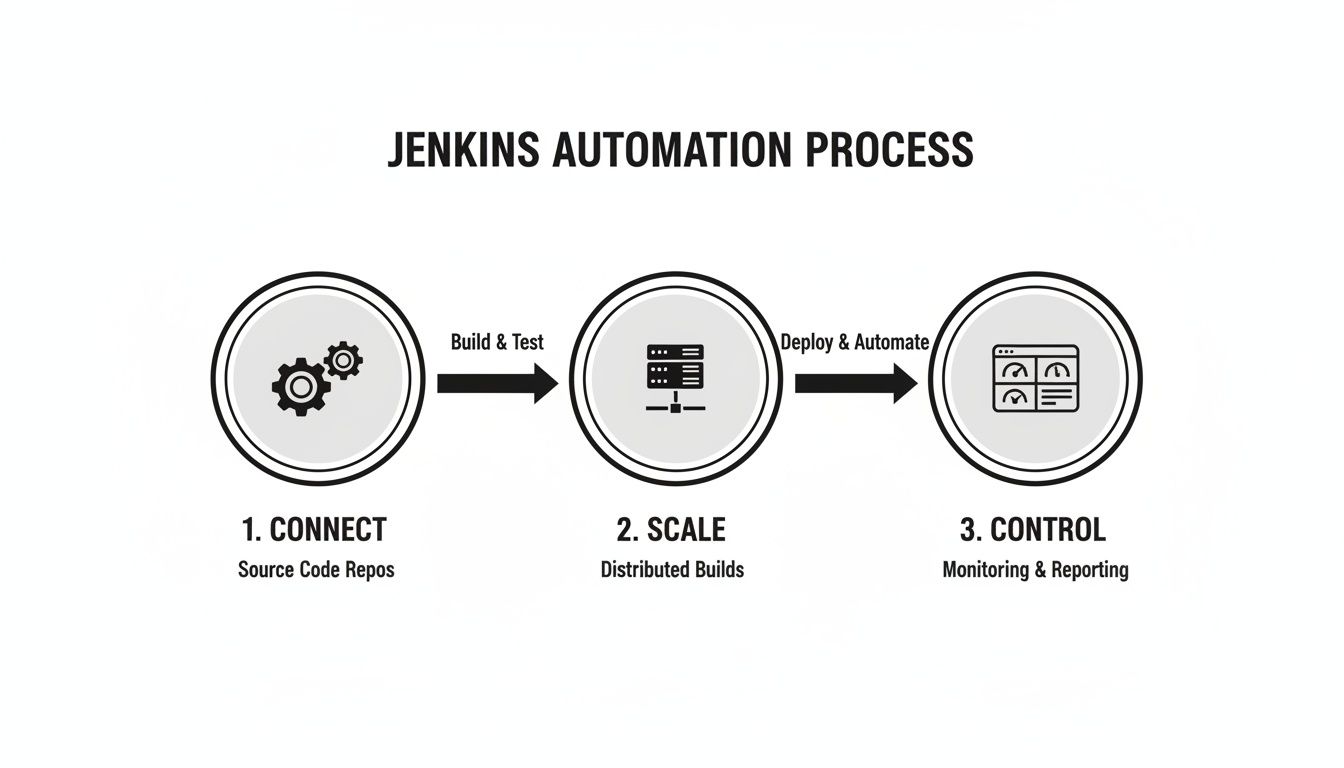
What you’re really building is a continuous cycle of integration, execution, and monitoring—not just a one-off task.
A Foundational Jenkinsfile Example
So, what does a basic Jenkinsfile actually look like? Here’s a simple starter template that covers the three essential stages: pulling the code, installing what it needs, and running the test suite.
pipeline { agent any
stages { stage(‘Checkout’) { steps { // This clones the repository you linked in the Jenkins job config git ‘https://github.com/your-username/your-repo.git’ echo ‘Source code checked out successfully.’ } } stage(‘Build’) { steps { // This is an example for a Node.js project. // You’d swap this with your project’s build command. sh ‘npm install’ echo ‘Project dependencies installed.’ } } stage(‘Test’) { steps { // Another Node.js example. // This command is what kicks off your test suite. sh ‘npm test’ echo ‘Automated tests completed.’ } } }}
Pro Tip: When you’re just starting,
agent anyis your best friend. It tells Jenkins to just grab any available build agent to run the pipeline. It’s perfect for simple setups. As your needs get more complex, you can get much more specific about where your jobs run.
This simple file is a fantastic starting point. Once you commit this to your repository, you officially have a functional pipeline that will automatically run your tests every time new code is pushed.
From here, you can start layering on more complexity. If you’re building out a full CI/CD workflow, this step-by-step guide to building your DevOps pipeline is a great next read. You can also explore more on the best practices for integrating testing into your CI/CD pipeline in our detailed guide.
Integrating Popular Test Frameworks and Reporting Tools
A pipeline that just runs tests in the background isn’t doing its job. The real magic happens when you hook Jenkins up to the tools your team already relies on. This is how you transform a wall of text in a console log into clear, actionable feedback that everyone can understand. We’re talking about making your test results visible, meaningful, and immediate.
So, let’s get beyond a simple npm test command and wire up some real-world frameworks. I’ll walk you through integrating both a front-end framework like Cypress and a back-end framework like TestNG. They cover common scenarios you’ll encounter and highlight how the configuration differs just enough to be interesting.
The key thing to remember is that Jenkins doesn’t actually run the tests itself. It’s the orchestrator. Your Jenkinsfile is the conductor, telling each tool exactly when and how to perform its part.
Capturing and Publishing Test Results
First things first: after you run your tests, you need to grab the results. Most modern testing frameworks can spit out a standardized XML report, usually in the JUnit format. This is where the JUnit Plugin—a true workhorse in any Jenkins environment—steps in. It knows exactly how to parse these reports and display them in a clean, trend-able format right inside the Jenkins UI.
Here’s a typical stage for running a TestNG suite (a popular choice for Java projects) and publishing its results.
stage(‘Backend Tests’) {
steps {

    // Your build tool, like Maven or Gradle, executes the TestNG suite

    sh './mvnw clean test'

}

post {

    always {

        // This step scoops up the results, regardless of whether tests passed or failed

        junit 'target/surefire-reports/*.xml'

    }

}
}
Pro Tip: The
postblock is incredibly useful. Using thealwayscondition ensures your test reports are archived even if the build itself fails. This is critical for debugging—the last thing you want is to lose your test evidence right when you need it the most.
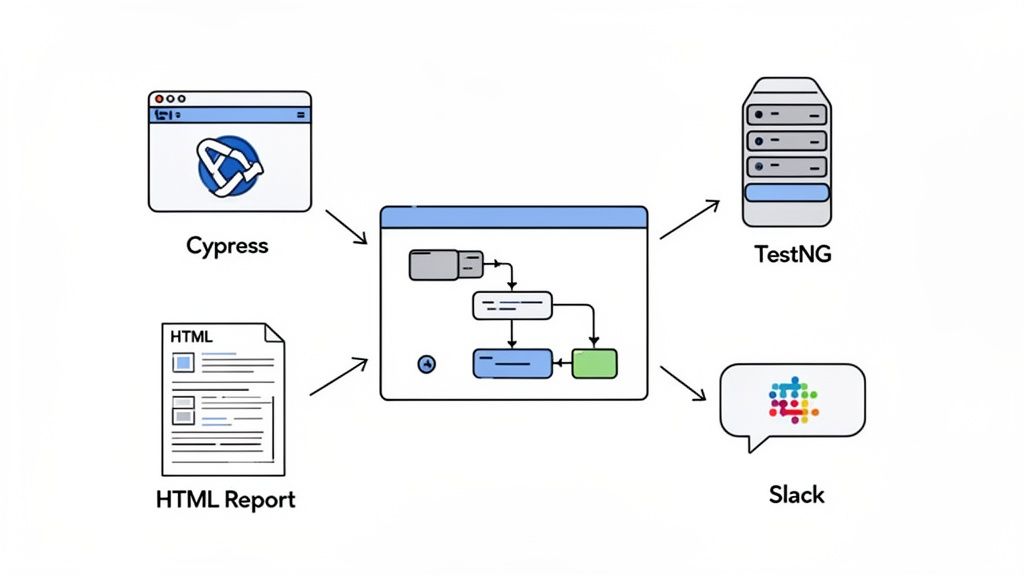
Visualizing Reports and Sending Notifications
While JUnit reports are fantastic for tracking pass/fail stats, end-to-end tests often generate much richer artifacts. Think HTML reports complete with screenshots and even videos of failed tests. For this, the HTML Publisher Plugin is your best friend, letting you archive and display these beautiful, interactive reports directly within a Jenkins build.
Let’s see what this looks like for a Cypress test suite.
stage(‘Frontend E2E Tests’) {
steps {

    // Run the Cypress test suite headlessly

    sh 'npx cypress run'

}

post {

    always {

        // Archive the detailed HTML report that Cypress generates

        publishHTML(target: [

            allowMissing: false,

            alwaysLinkToLastBuild: true,

            keepAll: true,

            reportDir: 'cypress/reports/html',

            reportFiles: 'index.html',

            reportName: 'Cypress E2E Report'

        ])

        // Don't forget to also archive the JUnit XML for Jenkins' native reporting

        junit 'cypress/results/*.xml'

    }

    failure {

        // If something breaks, ping the team on Slack immediately

        slackSend channel: '#qa-alerts', message: "Build ${env.BUILD_NUMBER} failed! Check results: ${env.BUILD_URL}"

    }

}
}
This kind of tight integration is where you see massive efficiency gains. In fact, some studies have shown that QA cycles can see time savings of up to 43% when Jenkins is paired with platforms that use bidirectional plugins to feed JUnit XML results directly into analytics dashboards. To dig deeper, you can explore some of Jenkins’ powerful integration capabilities over at aqua-cloud.io.
By weaving together test execution, rich reporting, and instant notifications, your Jenkins pipeline becomes more than just a task runner. It evolves into a central communication hub for your entire engineering team.
7. Advanced Strategies for Faster, More Efficient Pipelines
Once you have a solid pipeline reliably running your tests, the real fun begins. The next step is to make it faster and smarter. A test suite that drags on for hours becomes a bottleneck, completely undermining the whole point of rapid feedback. This is where we move past the basics and into strategies that deliver some serious efficiency boosts.
By far, the most impactful optimization you can make is test parallelization. Think about it: instead of running a massive test suite one test at a time on a single machine, why not split the workload? By distributing your tests across multiple Jenkins agents, you can slash execution times from hours down to just minutes. This means developers get critical feedback while the code is still fresh in their minds.
Supercharging Speed with Parallel Stages
Getting parallel execution set up in a Jenkinsfile is actually pretty straightforward. The magic happens with the parallel directive, which lets you define a block of stages that Jenkins will execute simultaneously on any available agents.
Let’s say you have three different test suites: smoke, regression, and api. Here’s a quick look at how you could run them all at once:
stage(‘Run Parallel Tests’) {
parallel {

    stage('Smoke Tests') {

        agent { label 'linux-worker' }

        steps {

            sh 'npm run test:smoke'

        }

    }

    stage('Regression Tests') {

        agent { label 'windows-worker' }

        steps {

            sh 'npm run test:regression'

        }

    }

    stage('API Tests') {

        agent { label 'linux-worker' }

        steps {

            sh 'npm run test:api'

        }

    }

}
}
In this setup, Jenkins will look for three available agents—two with the linux-worker label and one tagged windows-worker—and kick off all three test suites at the same time. The entire “Run Parallel Tests” stage wraps up as soon as the longest-running individual test suite is finished.
Managing Flaky Tests and Securing Credentials
As your test suite grows, two frustrating problems inevitably pop up: flaky tests and insecure secrets. A “flaky” test is one that passes sometimes and fails others for no apparent reason, often due to tricky timing issues or unstable environments. These are absolute poison for team morale because they erode trust in your entire automation setup.
A simple but incredibly effective tactic is to build in an automated retry mechanism.
By automatically re-running a failed test once or twice, you can filter out those annoying transient failures from genuine bugs. This one small change can dramatically stabilize your pipeline, prevent unnecessary build failures, and save your team from countless hours of chasing ghosts. For a deeper dive, you can explore more ways on how to troubleshoot test failures in CI/CD pipelines.
Here’s how you can add a retry block right into your Jenkinsfile:
stage(‘Run E2E Tests with Retry’) {
steps {

    retry(3) {

        sh 'npm run test:e2e'

    }

}
}
The other critical practice is managing secrets like API keys, database passwords, and auth tokens. Hardcoding these directly into your Jenkinsfile is a huge security no-no. The standard, and correct, way to handle this is with the Jenkins Credentials Plugin. It lets you securely store credentials within Jenkins itself and then safely inject them into your pipeline as environment variables when needed.
Building Smarter, Conditional Pipelines
Finally, remember that not every test needs to run on every single commit. If a developer just pushes a change to the documentation, running the entire end-to-end test suite is a complete waste of time and resources. You can make your pipeline much smarter by adding conditional logic.
Here are a few ideas for inspiration:
- Run API tests only when files in the
/apidirectory have changed. - Skip UI tests if only backend code was modified.
- Execute performance tests only on commits pushed to the
mainbranch.
This is all done using the when directive in your Jenkinsfile. It allows you to define precise rules for when a stage should run. This kind of targeted approach ensures your pipeline is not just fast, but also efficient with the resources it uses.
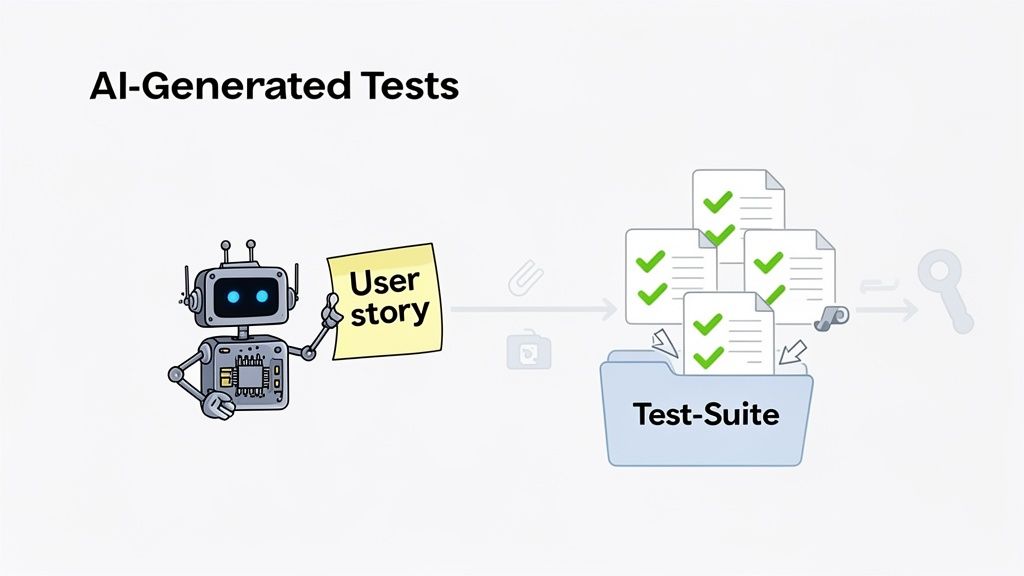
Leveling Up Your Pipeline With AI-Generated Tests
Alright, you’ve nailed down parallelization and credential management. Your Jenkins pipeline is running smoothly. So, what’s next? The biggest bottleneck still left in most test automation cycles is the manual work of writing the tests themselves.
This is where things get really interesting. We can bring in AI to handle test generation, which completely changes the game for achieving solid test coverage without slowing everything down. Instead of a QA engineer painstakingly scripting every single user flow, an AI agent can take a simple text prompt—think a user story or a quick feature description—and spit out the end-to-end tests for you. It’s a massive time-saver and lets your team validate new features almost instantly.
The trick is to weave this into a dedicated stage right inside your Jenkins pipeline.
Plugging AI Test Generation into Your Jenkinsfile
The workflow is pretty straightforward: first, you create a new stage that tells the AI to generate tests, and then you follow it up with another stage to run that newly created suite. Most of this is done with a simple API call.
Let’s say you’re using a tool like TestDriver. You would just add a stage that pings its API with your user story. The AI gets the prompt, does its thing, and generates the test scripts you need.
Here’s what that might look like in your Jenkinsfile:
stage(‘Generate AI Tests’) {
steps {

    script {

        // Grab the API key from Jenkins Credentials so it stays secure

        withCredentials([string(credentialsId: 'testdriver-api-key', variable: 'API_KEY')]) {

            // Fire off an API call to generate tests based on our new feature

            sh """

             curl -X POST [https://api.testdriver.ai/v1/generate](https://api.testdriver.ai/v1/generate)
                 -H "Authorization: Bearer ${API_KEY}"
                 -H "Content-Type: application/json"
                 -d '{

                       "prompt": "Verify a new user can successfully sign up using an email and password, receive a confirmation email, and log in.",

                       "outputDir": "./generated-tests"

                     }'

            """

        }

    }

}
}
This little script block safely pulls the API key from Jenkins credentials and sends a request to generate our tests, which then get saved right into a generated-tests directory.
Running and Reporting on AI-Generated Tests
Once the tests are generated, the next stage in your pipeline just needs to run them. It’s no different from executing any other test suite. The real magic here is that these tests are always perfectly aligned with the latest feature requirements, meaning new code gets validated on the spot.
This creates an incredibly powerful feedback loop. A developer pushes code, the pipeline automatically triggers the AI to write relevant tests, and Jenkins immediately runs them. All of this happens without anyone lifting a finger, ensuring test coverage keeps up with development speed instead of holding it back.
After the tests run, you’ll use your standard reporting tools like the JUnit and HTML Publisher plugins to gather the results and see how the new feature is holding up.
Of course, letting an AI write your tests doesn’t mean you can just walk away. It’s still super important to review what it produces. If you want to dive deeper, there are some great best practices for validating AI-generated test cases in software development that will help you make sure they’re hitting the mark. By building these steps into your process, you’ll have a truly modern, self-updating test automation framework.
Common Questions About Jenkins Test Automation
When you’re first setting up automated testing in Jenkins, a handful of questions almost always come up. I’ve seen teams wrestle with these time and again, so let’s clear the air and get you on the right track from the start.
Getting these fundamentals right will save you a ton of headaches down the road.
What’s The Difference Between A Declarative And Scripted Pipeline?
This is probably the most common question. The short answer is simplicity versus power.
Declarative Pipeline is the modern, preferred way to do things. It gives you a clean, structured syntax that’s far easier to read and maintain. For most test automation pipelines, this is exactly what you want.
Scripted Pipeline, on the other hand, is the old-school Groovy-based approach. It’s incredibly powerful and gives you the full flexibility of a programming language, but that comes with a much steeper learning curve. My advice? Start with Declarative. If you ever hit a wall and need to do something highly complex, you can always drop a script block right into your Declarative pipeline to get the best of both worlds.
How Should I Manage Different Test Environments?
Whatever you do, don’t hardcode URLs or credentials for staging, UAT, and production into your Jenkinsfile. I’ve seen it happen, and it always ends in a messy, brittle pipeline.
The right way to handle this is with environment variables and parameterized builds. Set up your Jenkins job with a parameter, like a dropdown menu, that lets you choose the target environment (e.g., staging or production) when you kick off a run. Your pipeline script then uses that choice to load the correct set of environment variables. This way, the exact same test suite can run against any environment without a single code change.
This keeps your pipeline code clean and your configuration separate from your logic. It’s a core principle of good CI/CD that makes your pipelines reusable and, more importantly, secure.
Can Jenkins Automate Tests For Mobile Apps?
Absolutely. Jenkins itself doesn’t care what it’s testing; it’s all about orchestration. It integrates perfectly with all the major mobile testing frameworks.
- For Android: You can hook it up to run your Espresso tests.
- For iOS: It works great with XCUITest.
- For Cross-Platform: Appium is a very popular choice.
The trick is in the setup. You’ll need a Jenkins agent running on a machine (usually a Mac for iOS) with access to physical devices or simulators/emulators. From there, the pipeline simply triggers the build and test commands, pulls the results back, and reports on them just like it would for a web app.
What Are The Most Essential Jenkins Plugins?
The Jenkins plugin marketplace is huge, which can be overwhelming. But for a solid test automation setup, a few are practically non-negotiable. Beyond the basics like the Pipeline plugin, you’ll definitely need these 5 workhorses:
- Git Plugin: Obvious, but essential for pulling your code from source control.
- JUnit Plugin: The standard for publishing test results and tracking trends over time.
- HTML Publisher Plugin: Invaluable for displaying rich, interactive reports from tools like Cypress or Playwright.
- Credentials Binding Plugin: The only secure way you should be handling API keys, passwords, and other secrets.
- Slack Notification Plugin: For getting immediate feedback to your team when a build breaks. Nobody likes a silent failure.
Start with this set, and you’ll have a rock-solid foundation for building out your automation workflow.
Ready to supercharge your testing pipeline and eliminate manual scripting bottlenecks? TestDriver uses an AI agent to generate end-to-end tests from simple prompts, letting your team focus on building features, not writing boilerplate code. Discover how you can increase test coverage and accelerate your releases at https://testdriver.ai.
Automate and scale manual testing with AI
TestDriver uses computer-use AI to test any app - write tests in plain English and run them anywhere.